

Before I start:
Warning: Do not try the whole program. this will disable your youtube account for spamming reasons.
So, I recently wanted to go to everyone, and tell that I have started a blog. So, I thought, why not go to youtube videos related to my contents and drop links? so I planned to do the same. But, there are so many youtube videos, and I have only so less time. So I planned to write a youtube bot for the work, which(who ?) would perfectly do this job given the proper search query and the comment. And hereby I introduce you to the second tutorial to web scraping; web scraping using selenium-python binding.If you want to know what web scraping is and how to do basic web scraping, first read this post .
This project is really long and a solid read and here are the sections of this article:
I will scrape web pages using selenium. As selenium automate the browsers, you can write scripts to automate tasks which you want to do in webpages, or searching, or scraping.
Here, I will not do any scraping as par say; but I will explore the features of selenium which are widely used for web scraping and then I will create my bot out of it.

(2) find the source:
Now, you want to find out which page is what. So, right click, and you will find the list; where you can find the option of inspect elements. Choose that. Now, your page should open a side with the whole page source, stylings and bunch of other staffs.
(3)find that element and read its code:
Now, there will be a choice; on the left top of this bar; which will read "select an element in the page to inspect it" and this gives you a mighty arrow to wield, with which whatever element you select in the page, you will get the html code blued out in the source. This is really a time saving process to learn about the related tags, ids or ways to find out the important buttons from the source and perform operations using them. This will look something like this if the bars open horizontally:

So, this is the way, you will have to find the items and tags.
(4) check that it is that element indeed:
See, first, if you put your arrow on that piece of code, that element or that portion of the page should light up or change color. Also, if you observe well, there will be styles available. These styles often can be checked unchecked manually. You can do so to (1) see changes in the target object and also (2) learn how styles work.So, this is how you will test it.
Now, you have to learn a bit of selenium. This tutorial will already assume that you know how basics of python works; you can write loops, understand what import mean and other staffs. For selenium, the things we need here are:
 But you will run into a lot of problems if you try to run these lines in your pc. Let me guide you line by line:
(1) first, you try the first line in your pc. If it says, "module not found" it means that selenium module is not in your pc. do pip install selenium and download it.
(2) now it works, and time will be there as a module for default.
(3) what is the problem with executable path thing?
well, you have to provide exact path for the program to retrieve the firefox geckodriver into the program to activate the web driver. If you get error in this line, first go and find that which is the respective webdriver for your beloved browser. Then, as you most probably will not have it in your pc, you will have to download it. So, first, in this case, I downloaded the geckodriver. But there does not end the problem.
You will have to provide the exact path for finding the file as above. You may doubt what r stands for? r stands for raw, i.e. you have given the raw path to the file. So, if your browser is X and your path is Y, the above code will become:
driver= webdriver.X(executable_path=r'Y')
Now, you have set it up. On execution of the last code line, driver will be created and it will open a tab in your desired server. Now the game starts.
when you open a button or tag, which has a very unique id; you will want to get that element by searching for the id; or if you want all the elements under the same id from a page; then this is your go to find method. the syntax is:
driver.find_element_by_id("id-name") for finding one element
driver.find_elements_by_id("id-name") for finding one element
(b) find_element_by_tag_name:
when you open want to access all the informations regarding a tag; i.e. in general when a web scraper scraps a site for links, it wants to search all the <a> tags, as the way to input a reference is to put it via the following way: <a href=link></a> . So, the web scrapers will scrap all the a tags. Similarly, you may want to do something similar too.
The proper syntax is again:
driver.find_element_by_tag_name("tag") for finding one element and elements for finding multiple.
(c)find_element_by_css_selector:
In many tags or classes or items in the page, the css styles maybe used to create a finding path. Lets take this following example
<button id="paper-button" class="ytp ytp-renderer" size-default name="search-button">
here, you can find this element by selecting the css selector ytp.ytp-renderer.size-default.search-button. Consider the following that, in css selector forming, a space inside the class name will turn into a (.) and the tag( here tag is name) will be added with dot too. Other than that, you will have to add each style specification by using a dot to connect.
Then you will have a css.selector which is more like a path and then the correct syntax will be
driver.find_element_by_css_selector("css.selector")
(d) find_element_by_xpath:
in this case, one tries to find path using XML path. This is complicated and I generally have not used it much. In this case also, you will form the Xpath and put it as the argument and the rest is same. You can visit w3schools.com to read tutorial about Xpath.
As the button will be found inside the loop, we will now interact with the button. Here, understand that you click the button in real, hence, you will interact with the button by the syntax button.click().
Here, considerable errors are:
once the page refreshes after clicking sign in, the DOM will refresh and then this will give an error, called StaleElementReference exception. This means that the element is not either connected to the DOM or the element is not interactive. To clarify, here the first thing occurs and therefore it raises an exception, after it does the required work.
You can also read about StaleElementReference here.
Now, the sign in page will be on your tab and you want to write your email and password into the site and log in. For this, you will use a attribute called send_keys(); which will basically send the argument string in the box, with which the attribute is attached. And one other thing is that, you will have to click at the next button. For this, you will have to find the next button, and have to click that button. For this the code is like this:
 Notice the above facts in the code snippet. here, the box can be identified by "identifier" name. i.e. if you see the code portion <>, there is name="identifier" inside the code for the box. Here, you can write the gmail address of yours, and then using send_keys(), you can send it inside the box. Then, to close the entry, like pressing that "Enter" in your keyboard, you have to use this submit() attribute. This will close the entering information in the box.
Now, in get_button_next, you will again find it by id by name "identifierNext". Now, once you get the element, we click it using click().
At the end of the code, I have put time.sleep(15); which means that the code block will wait for 15 seconds. Although it was not that necessary, but when you need to wait for X seconds; you have to use this time.sleep(X).
The next block, is exactly similar. Just read it and try to understand yourself. If you do not understand, please comment and I will explain.
Now, you will enter the logged in page. Now, remember what we have to do, we want to access a specific search results for some topic, access a lot many videos of that topic; and then comment on each one once, where the comment and the search query will be given.
The code for the same is below; and it pretty much uses the above tricks again and again.
The way I have done this is:
(1) I have found the box and button for search; provided the search query; then clicked the search button.
(2) manually I have zoomed out the page to 25% for,
(a) loading more pages at one go(although I could have scrolled to get more pages; but for this code I have not done so)
(3)acquired all the http references for the videos; and then stored them in a list.
(4)implemented a way to check that the href provided only reaches a playable video and not something else. For this I have checked that whether it contains the word "watch" in a specific position.
(5)Implemented a method to wait until the comment box is loaded and then found the box, clicked on it to activate it, send the comment into it; and at last clicked the "comment" button to complete the commenting.
(6) this thing, I have run in a for loop over all references in the list of http references. Therefore, it goes to each video, checks its reference whether it is a playable video's link; then goes into that link, waits for the comment box, comments and gets to the next link.
(7)The loop stops multiple times; without any explanation or error, most probably due to machine's time constraints and other things like that. So, I manually run it until it works through all the links.
So, as the audience is intelligent enough to understand; I will now upload the rest of the codes unexplained.
The code snippets are below:
(1) searching and getting the links:

(2) the main loop:

Some other points to note here that: try and except is a unlikely conditional and used in good python projects to try something and raise an exception if that can not be done. So, you may want to check up about try and except conditional.
Also, as the timeout and wait command was not a much integral part of my code; I have not provided a description of the same. But a wait().until() is generally used to make the webdriver wait; until some condition is satisfied; like here the page has the placeholder area; the id of the comment box loaded.

Also, the page source can be much much bigger than your program itself and downloading the page_source will make your program slower and inefficient. This is an important point to note.
- Introduction to selenium
- Selenium Features to know off the top of your head
- How to find specific element
- Setting up Selenium
- Accessing any url
- bot's code and explanation
- Specific errors and reasons happening with selenium
- why soup does not work here?
- Conclusion
Introduction to selenium:
Selenium is a framework to test softwares and web applications with automation, rather than the tester of the code using all his times in life in manual testing. Lets hear the history from the selenium's official site itself:
Selenium first came to life in 2004 when Jason Huggins was testing an internal application at ThoughtWorks. Being a smart guy, he realized there were better uses of his time than manually stepping through the same tests with every change he made. He developed a Javascript library that could drive interactions with the page, allowing him to automatically rerun tests against multiple browsers. That library eventually became Selenium Core, which underlies all the functionality of Selenium Remote Control (RC) and Selenium IDE. Selenium RC was ground-breaking because no other product allowed you to control a browser from a language of your choice.
While Selenium was a tremendous tool, it wasn’t without its drawbacks. Because of its Javascript based automation engine and the security limitations browsers apply to Javascript, different things became impossible to do. To make things worse, webapps became more and more powerful over time, using all sorts of special features new browsers provide and making these restrictions more and more painful.
In 2006 a plucky engineer at Google named Simon Stewart started work on a project he called WebDriver. Google had long been a heavy user of Selenium, but testers had to work around the limitations of the product. Simon wanted a testing tool that spoke directly to the browser using the ‘native’ method for the browser and operating system, thus avoiding the restrictions of a sandboxed Javascript environment. The WebDriver project began with the aim to solve the Selenium’ pain-points.
Sponsored Ads:
Learn how to create web scraping bots from udemy today!
Selenium had massive community and commercial support, but WebDriver was clearly the tool of the future. The joining of the two tools provided a common set of features for all users and brought some of the brightest minds in test automation under one roof. Perhaps the best explanation for why WebDriver and Selenium are merging was detailed by Simon Stewart, the creator of WebDriver, in a joint email to the WebDriver and Selenium community on August 6, 2009.
“Why are the projects merging? Partly because WebDriver addresses some shortcomings in selenium (by being able to bypass the JS sandbox, for example. And we’ve got a gorgeous API), partly because selenium addresses some shortcomings in WebDriver (such as supporting a broader range of browsers) and partly because the main selenium contributors and I felt that it was the best way to offer users the best possible framework.”So, this is how, selenium tool came to live. Now, I use python, and do not have anything to test, i.e. I am not a tester of some software company. So, how will I use selenium?
I will scrape web pages using selenium. As selenium automate the browsers, you can write scripts to automate tasks which you want to do in webpages, or searching, or scraping.
Here, I will not do any scraping as par say; but I will explore the features of selenium which are widely used for web scraping and then I will create my bot out of it.
Features to know off the top of your head:
First of all, you will need to know how, does a html and css paper look like. The easiest example will be, click right , choose to view page source; and then look at the page source. There are mainly three things in a page source
(1) html tags:
(2) css styles:
(3) javascript functions
The most things you are going to get in a page source is div. div refers to a block of html codes grouped as one, mainly for styling or functional purposes. So, in a good webpage, you will see that all the elements are grouped under one div or multiple divs. Then there will be tags, like <a> for http references, <body> for the body of the html code, <html> for the whole html file, <p> for paragraph and similar lot many things.
Css styles are really a lot; like starting from sizes and padding, colors and background colors; there are so many css styles that you can even think of only.
Javascript functions will be there present; but as I do not know that much of a javascript I will not talk about it.
So, why am I taking about what makes a html page? and that's where we come. Because, for a new page, let's say I am going to do something in reddit tomorrow; there I will have to read the page source; and will have to find out which functionality lies between which tag or button or clickable items.
If you like the article upto this point; please show your support!
how will you find some specific item's related code from the page source?
this part, is easy and tiresome too. Lets go by steps therefore:
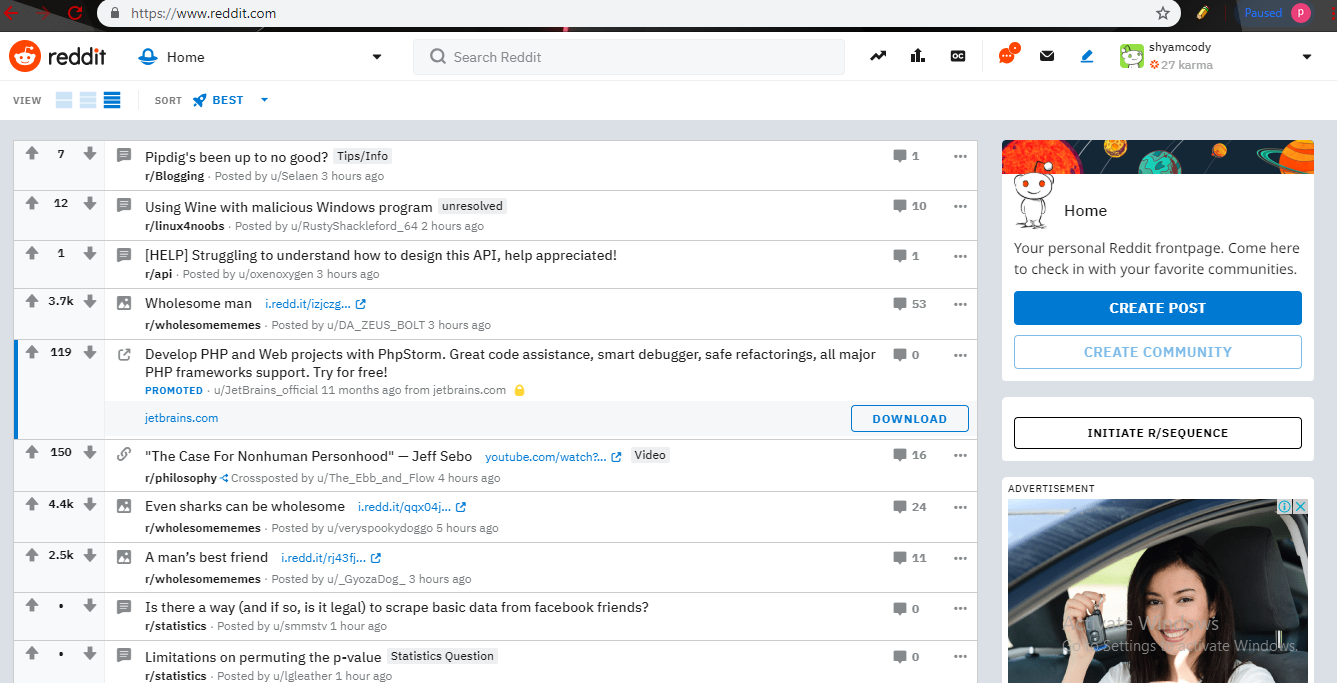
(1) open the page: open the required url you want to go in. Now, let's say I want to inspect reddit.com. So, I will go to reddit.com. Now, the page looks like:
Now, you want to find out which page is what. So, right click, and you will find the list; where you can find the option of inspect elements. Choose that. Now, your page should open a side with the whole page source, stylings and bunch of other staffs.
(3)find that element and read its code:
Now, there will be a choice; on the left top of this bar; which will read "select an element in the page to inspect it" and this gives you a mighty arrow to wield, with which whatever element you select in the page, you will get the html code blued out in the source. This is really a time saving process to learn about the related tags, ids or ways to find out the important buttons from the source and perform operations using them. This will look something like this if the bars open horizontally:

(4) check that it is that element indeed:
See, first, if you put your arrow on that piece of code, that element or that portion of the page should light up or change color. Also, if you observe well, there will be styles available. These styles often can be checked unchecked manually. You can do so to (1) see changes in the target object and also (2) learn how styles work.So, this is how you will test it.
Now, you have to learn a bit of selenium. This tutorial will already assume that you know how basics of python works; you can write loops, understand what import mean and other staffs. For selenium, the things we need here are:
Setting up selenium:
First you have to set up selenium. Below I will show you the snip for selenium setup.
(1) first, you try the first line in your pc. If it says, "module not found" it means that selenium module is not in your pc. do pip install selenium and download it.
(2) now it works, and time will be there as a module for default.
(3) what is the problem with executable path thing?
well, you have to provide exact path for the program to retrieve the firefox geckodriver into the program to activate the web driver. If you get error in this line, first go and find that which is the respective webdriver for your beloved browser. Then, as you most probably will not have it in your pc, you will have to download it. So, first, in this case, I downloaded the geckodriver. But there does not end the problem.
You will have to provide the exact path for finding the file as above. You may doubt what r stands for? r stands for raw, i.e. you have given the raw path to the file. So, if your browser is X and your path is Y, the above code will become:
driver= webdriver.X(executable_path=r'Y')
Now, you have set it up. On execution of the last code line, driver will be created and it will open a tab in your desired server. Now the game starts.
accessing any url:
for accessing a url, your code will be driver.get('url') and the driver will open the url on the opened tab.
finding elements by various ways:
In general you can do two types of things, by 4 ways. i.e. you can search for one tag or all tags, one id object or all of the objects with the same id and etcetera. This is the two types of things. And there are 4 ways to do each of these types.
(a) find_element_by_id:when you open a button or tag, which has a very unique id; you will want to get that element by searching for the id; or if you want all the elements under the same id from a page; then this is your go to find method. the syntax is:
driver.find_element_by_id("id-name") for finding one element
driver.find_elements_by_id("id-name") for finding one element
(b) find_element_by_tag_name:
when you open want to access all the informations regarding a tag; i.e. in general when a web scraper scraps a site for links, it wants to search all the <a> tags, as the way to input a reference is to put it via the following way: <a href=link></a> . So, the web scrapers will scrap all the a tags. Similarly, you may want to do something similar too.
The proper syntax is again:
driver.find_element_by_tag_name("tag") for finding one element and elements for finding multiple.
(c)find_element_by_css_selector:
In many tags or classes or items in the page, the css styles maybe used to create a finding path. Lets take this following example
<button id="paper-button" class="ytp ytp-renderer" size-default name="search-button">
here, you can find this element by selecting the css selector ytp.ytp-renderer.size-default.search-button. Consider the following that, in css selector forming, a space inside the class name will turn into a (.) and the tag( here tag is name) will be added with dot too. Other than that, you will have to add each style specification by using a dot to connect.
Then you will have a css.selector which is more like a path and then the correct syntax will be
driver.find_element_by_css_selector("css.selector")
(d) find_element_by_xpath:
in this case, one tries to find path using XML path. This is complicated and I generally have not used it much. In this case also, you will form the Xpath and put it as the argument and the rest is same. You can visit w3schools.com to read tutorial about Xpath.
The bot's code and its explanation:
After first importing the selenium and other things, the first bit is finding the sign in button. The point of signing in is that I want to comment and one can not comment without logging in. That's why, we have to "sign in". First we will have to find the button by find_element_by_tag_name and then we are going to perform click action. See the code below:

On inspecting the youtube page by the above method, we find that the "sign in" is named with a tag paper-button. Here, I was not sure that whether there is only one button with tag paper button, therefore I have selected all of such buttons, and then as you can see on the page source, that the sign in button, the text is SIGN IN, I run through the list of elements, and check that whether the element's text is sign in. Here consider this thing; when a tag contains a text inside, you can access the text by the syntax tag.text, and therefore, we have checked for the sign in button successfully.
As the button will be found inside the loop, we will now interact with the button. Here, understand that you click the button in real, hence, you will interact with the button by the syntax button.click().
Here, considerable errors are:
once the page refreshes after clicking sign in, the DOM will refresh and then this will give an error, called StaleElementReference exception. This means that the element is not either connected to the DOM or the element is not interactive. To clarify, here the first thing occurs and therefore it raises an exception, after it does the required work.
You can also read about StaleElementReference here.
Now, the sign in page will be on your tab and you want to write your email and password into the site and log in. For this, you will use a attribute called send_keys(); which will basically send the argument string in the box, with which the attribute is attached. And one other thing is that, you will have to click at the next button. For this, you will have to find the next button, and have to click that button. For this the code is like this:

Now, in get_button_next, you will again find it by id by name "identifierNext". Now, once you get the element, we click it using click().
At the end of the code, I have put time.sleep(15); which means that the code block will wait for 15 seconds. Although it was not that necessary, but when you need to wait for X seconds; you have to use this time.sleep(X).
The next block, is exactly similar. Just read it and try to understand yourself. If you do not understand, please comment and I will explain.
Now, you will enter the logged in page. Now, remember what we have to do, we want to access a specific search results for some topic, access a lot many videos of that topic; and then comment on each one once, where the comment and the search query will be given.
The code for the same is below; and it pretty much uses the above tricks again and again.
The way I have done this is:
(1) I have found the box and button for search; provided the search query; then clicked the search button.
(2) manually I have zoomed out the page to 25% for,
(a) loading more pages at one go(although I could have scrolled to get more pages; but for this code I have not done so)
(3)acquired all the http references for the videos; and then stored them in a list.
(4)implemented a way to check that the href provided only reaches a playable video and not something else. For this I have checked that whether it contains the word "watch" in a specific position.
(5)Implemented a method to wait until the comment box is loaded and then found the box, clicked on it to activate it, send the comment into it; and at last clicked the "comment" button to complete the commenting.
(6) this thing, I have run in a for loop over all references in the list of http references. Therefore, it goes to each video, checks its reference whether it is a playable video's link; then goes into that link, waits for the comment box, comments and gets to the next link.
(7)The loop stops multiple times; without any explanation or error, most probably due to machine's time constraints and other things like that. So, I manually run it until it works through all the links.
So, as the audience is intelligent enough to understand; I will now upload the rest of the codes unexplained.
The code snippets are below:
(1) searching and getting the links:


Some other points to note here that: try and except is a unlikely conditional and used in good python projects to try something and raise an exception if that can not be done. So, you may want to check up about try and except conditional.
Also, as the timeout and wait command was not a much integral part of my code; I have not provided a description of the same. But a wait().until() is generally used to make the webdriver wait; until some condition is satisfied; like here the page has the placeholder area; the id of the comment box loaded.
Specific errors and reasons:
(1) staleElementReference exception:
I have already explained and provided links to it.
(2) NosuchElementReference exception:
When accidentally you refer to some element, tag or id; which the program can not find within the scope of timing and space of webpage accessible. This may occur due to:
(a) the element is wrongly spelled by you or not properly written for some reason
(b) the element did not get loaded
(c) the page got refreshed
(3) Not interactable exception
( this is not the exact name; but if you read you will understand):
Selenium automates and empowers browser interaction; but you can not interact with a tag/id/button which is not allowed by the web developer to interact. This can come from when you are trying to exactly identify which tag or id is to interact to press or click a button or get some other action done. When you accidentally try to interact with a tag not reachable by keyboard; you will get such an error. This means you will have to find the proper element to interact; or may have to activate it by clicking, zooming or bring it out from a drop down list to interact.
(4) Session id refreshment error:
(4) Session id refreshment error:
Selenium gets the elements like ids and tags as selenium browser elements with specific session item and ids. It does not get the details of the codes as get_source requests. Therefore, if you try to interact with a stored element after you have refreshed the page or have gone through some more pages and have come back to the page, you can not use those items anymore. This is a important point and therefore, you need to extract your informations while the session is live only.
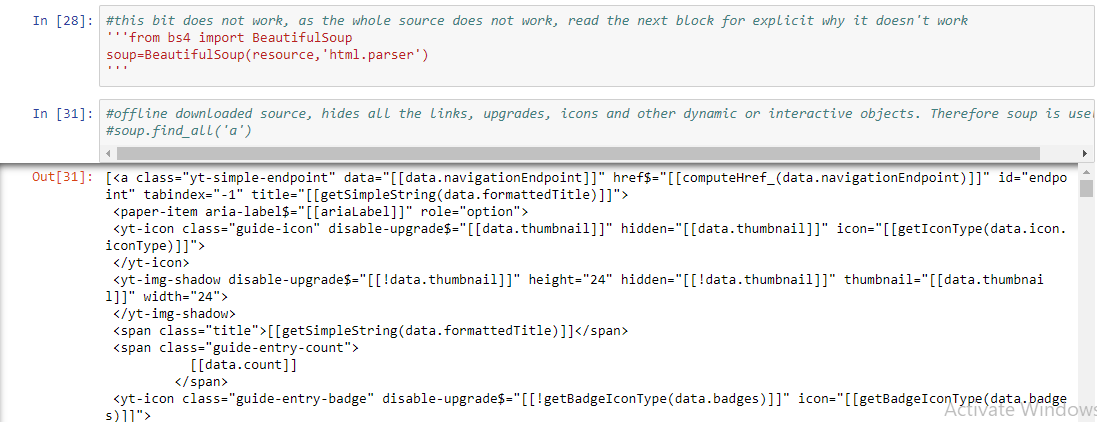
why soup does not work here?
One more thing I would like to mention is that, you can not actually access most of the dynamic informations like http references, design details, written descriptions of different buttons and items on the page if you download the page_source. One can think from the beautiful soup tutorials that downloading the page_source and then extracting informations from it using BeautifulSoup tools and commands. While it is a nice approach for small pages and smaller scaled tasks; selenium and APIs are better things to work with if you want to really extract any data and so on so. Here is a snippet how the downloaded source has everything hidden and unfortunately it is even written there that it is hidden:
Conclusion:
Hope, you understand both how selenium works, and get inspired to create your own toy projects and play around with making new bots to automate your boring staffs. You can also follow the book called automating boring stuffs with python by Al swegart. I have recently started another blog post in which I will continue to update my reviews about the same. You can view this here. Also, I have compiled an advanced version of such project to automatically post in a social media using an API; which you can read here. So, hope you enjoy this blog, visit us again; and you are awesome!Show your support and
Comments
Post a Comment